
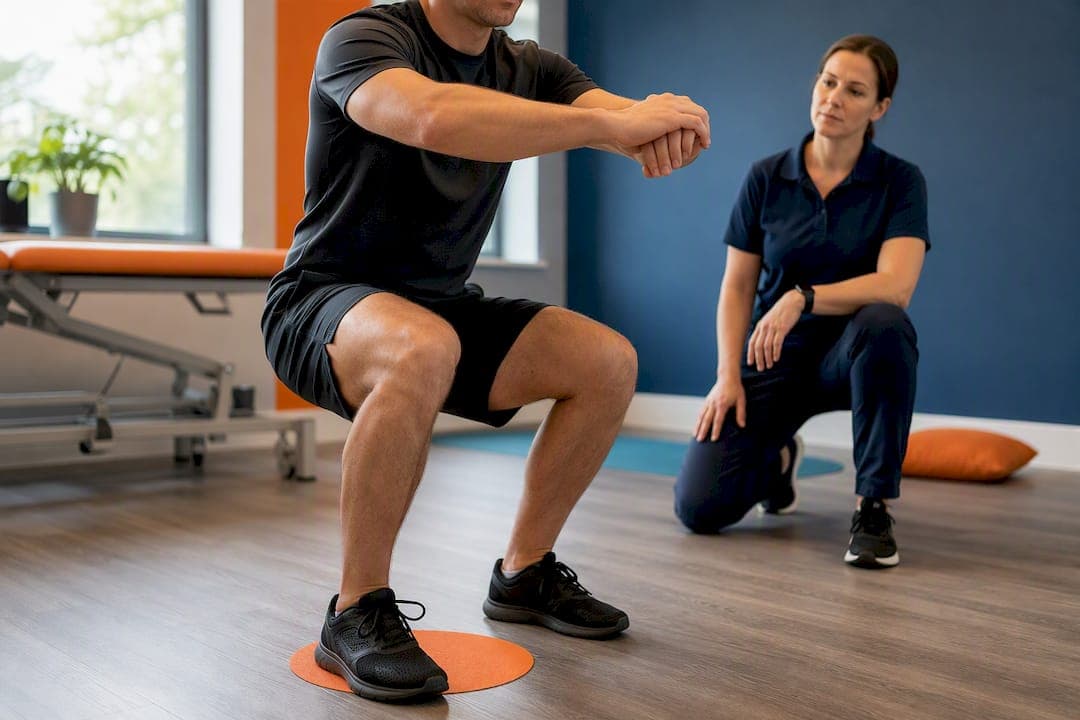
The best immediate step for patellofemoral pain is a targeted hip-and-quadriceps strengthening programme combined with sensible activity modification. Start with low-load hip activation, clamshells, side leg raises, and quad sets, then add step-ups and mini-squats as pain allows. Use clear pain-monitoring rules and progress gradually rather than stopping activity altogether.
TL;DR:
- Strengthening the hip abductors and quadriceps in a gradual, progressive manner is essential for effective patellofemoral pain relief.
- Exercises should be layered with resistance, controlled depth, and slow tempo to build strength safely over six weeks.
- Avoid exercises that cause sharp, persistent pain and prioritize movement control, especially regarding knee valgus during squats or step-downs.
- Foot pronation may worsen symptoms and should be assessed, but core recovery focuses on muscle balance and control rather than footwear alone.
- A personalized assessment and proper technique correction are crucial, as most cases respond well to targeted rehab rather than generic advice.
Table of Contents
- Core patellofemoral pain exercises to start today
- Building a progressive 6-week rehabilitation plan
- How much pain is safe during these exercises?
- Fixing the technique errors that sabotage recovery
- What happens during a patellofemoral assessment at Parkstherapycentre
- Which stretches actually help patellofemoral pain?
- What actually causes patellofemoral pain syndrome?
- Do shoes and foot alignment make a difference?
- Why balance training belongs in your rehab plan
- Fitting exercises into a full recovery routine
- Where to read more on patellofemoral pain
- The mistake most patellofemoral advice makes
- Get a personalised plan from Parks Therapy Centre
- Sources
Core patellofemoral pain exercises to start today
Patellofemoral pain syndrome responds best to a structured mix of hip and quadriceps work, because weak hip abductors let the thigh bone rotate inward and drag the kneecap off its natural track. Strengthening the gluteus medius and quadriceps helps stabilise the patella and eases pain at the front of the knee. Here is the sequence we use with patients at Parkstherapycentre, broken down by purpose and progression.
- Clamshell. Lie on your side, knees bent, feet together. Lift the top knee while keeping feet touching. This isolates the hip external rotators without loading the knee. Progress by adding a resistance band above the knees, then increasing the hold to three seconds at the top.
- Side-lying leg raise. Same starting position, but lift the whole leg straight, keeping the hip stacked. Targets gluteus medius directly. Progress with ankle weights or slower tempo (four seconds up, four down).
- Glute bridge. Lie on your back, knees bent, feet flat. Push hips upward, squeezing the glutes at the top. Progress to single-leg bridges once double-leg feels easy for 15 reps.
- Straight leg raise. Lying flat, tighten the quadriceps before lifting the leg to hip height. Good for early rehab when bending the knee is uncomfortable. Add ankle weights once 20 smooth reps are pain-free.
- Quad sets. Simply tense the thigh muscle with the knee straight, holding for five seconds. Useful even on bad days because there's no joint movement at all.
- Wall sit. Back against a wall, knees bent to a comfortable angle (start shallow, around 45 degrees). Builds quadriceps endurance under sustained load. Progress by lowering the angle or extending the hold time.
- Step-up and step-down. Step onto a low box, focusing on control rather than speed. This is one of the most functional patellar tendon exercises going, because it mimics stairs and hills directly.
- Mini-squat. Bend to 30 to 45 degrees, knees tracking over the toes. Progress depth and load only once form is solid.
If knee pain is sharp or constant, spend the first week or two on hip-only work, clamshells, side leg raises, and quad sets, before introducing anything that loads the knee directly. Once symptoms settle, layer in step-ups and mini-squats.
Pro Tip: Film yourself from the front doing a step-down on your phone. Most people are shocked to see their knee drifting inward, something that's almost impossible to feel from the inside but obvious on camera.
Building a progressive 6-week rehabilitation plan
Isolated exercises only work if they're progressed with a plan behind them. Begin every other day, allowing muscles 24 to 48 hours to recover between sessions, and aim for 2 to 3 sets per exercise. Start around 10 repetitions and build toward 20 as strength improves, adjusting the target according to pain tolerance rather than a fixed number.
Three levers drive progression:
- Resistance: add a light band, then a heavier one, before considering ankle weights.
- Height and depth: raise step height gradually and deepen squats only once shallow reps are pain-free.
- Tempo: slow the lowering phase to increase time under tension without adding load.
A sample plan might look like this:
- Weeks 1 to 2: Hip-focused isolation work daily, walking maintained at a comfortable pace, no running.
- Weeks 3 to 4: Introduce step-ups, mini-squats, and wall sits; begin light gym work such as leg press within a pain-free range.
- Weeks 5 to 6: Increase load and step height; if walking and gym sessions are symptom-free, trial a short, flat run with walk breaks.
Recovery is rarely instant. Patellofemoral pain typically improves slowly, often needing months of consistent work rather than a quick fix, so treat the six weeks as a foundation rather than a finish line. Reducing training volume, avoiding hills, and building in walk breaks during any return to running keeps fitness ticking over while symptoms settle.
How much pain is safe during these exercises?
A mild to moderate increase in discomfort during exercise is generally acceptable, provided it settles within an hour or so afterwards. Morning-after stiffness that's no worse than the day before is a reasonable sign you're on the right track. Watch for these warning signs instead of pushing through them:
- Sudden swelling around the kneecap
- The knee locking or giving way
- Numbness or tingling down the leg
- Pain that rapidly worsens session to session rather than settling
Exercise therapy remains the primary treatment for patellofemoral pain, and passive treatments like ultrasound or injections shouldn't replace it. If there's no steady improvement after four to eight weeks of consistent, well-structured exercise, that's the point to book physiotherapy rather than keep guessing at home.
Fixing the technique errors that sabotage recovery
Knee valgus, where the knee drifts inward toward the midline during a squat or step, is the fault we see most often, and it's usually the reason exercises fail to reduce pain. Watch for the knee travelling well past the toes on step-downs, or the foot rolling inward as the heel lands. Both point to the same underlying issue: the hip isn't controlling the leg properly.
Quick fixes are often simple. Lower the box height on step-downs until control returns, then rebuild height gradually. Widen the stance slightly on squats and consciously push the knees outward, aiming to keep the knee tracking over the second toe throughout the movement.
A useful tactile cue for quad sets and straight leg raises is placing your fingertips just above and to the inside of the kneecap, then lightly contracting the thigh muscle to feel the vastus medialis obliquus switch on. If you can't feel anything under your fingers, the exercise probably isn't doing what you think it is.
- Watch the knee from the front during squats, not just the mirror in front of you.
- Reduce box height or squat depth the moment form breaks down.
- Use the "knee over second toe" cue as a constant visual check.
Pro Tip: Temporary patellar taping can reduce pain enough to tolerate exercise properly while you retrain movement patterns, but it's a short-term aid, not a long-term fix. Rely on strength, not strapping.
What happens during a patellofemoral assessment at Parkstherapycentre
Every rehabilitation plan at Parkstherapycentre starts with a detailed movement analysis, watching you walk, squat, and step to spot exactly where control breaks down. Muscle testing follows, checking hip abductor and quadriceps strength against the other leg to find genuine imbalances rather than guessing at them.
From there, we build a personalised exercise prescription rather than handing over a generic sheet, adjusting reps, load, and step height to match what your knee can currently tolerate. Progress gets tracked at each review, so decisions to advance the programme are based on measured improvement, not assumption.
A first appointment typically covers assessment, initial exercise teaching, and a clear plan for the weeks ahead. Since 1986, our multidisciplinary team across Bedfordshire and Buckinghamshire has combined physiotherapy with patient education, and online booking makes starting that process straightforward.
Which stretches actually help patellofemoral pain?
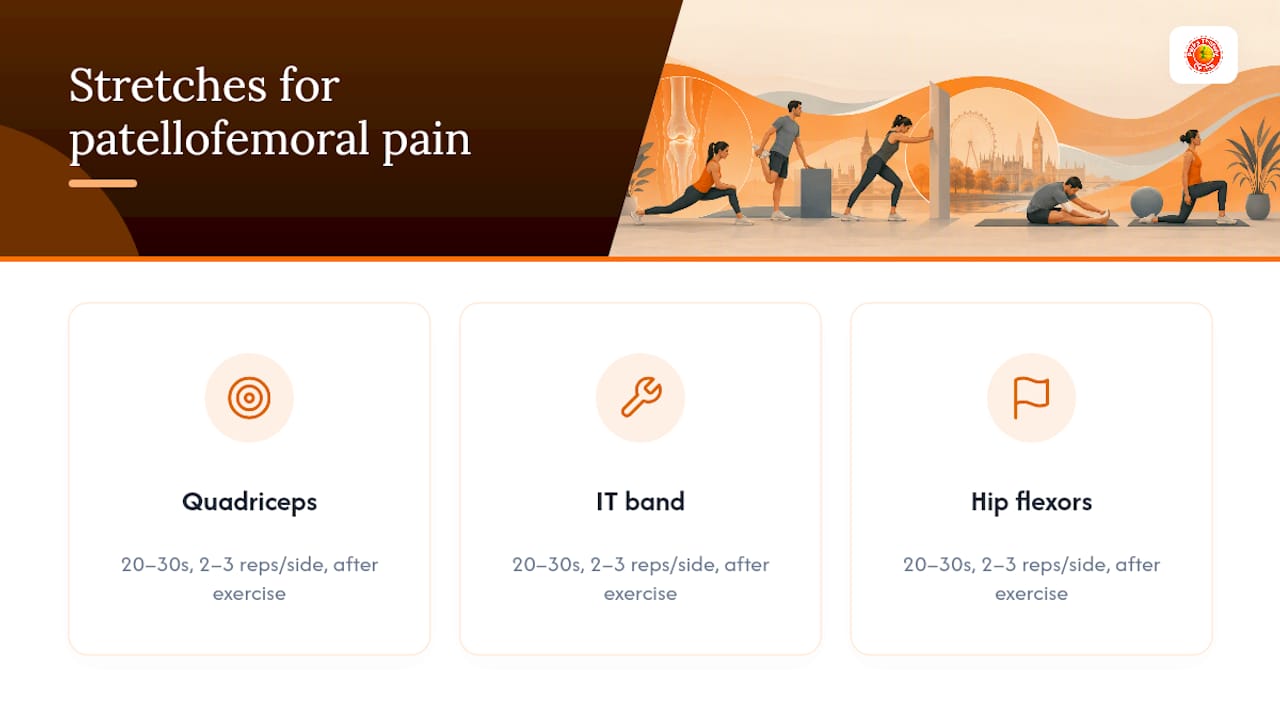
Tight structures around the knee pull the patella off its natural line just as much as weak muscles do, which is why stretching sits alongside strengthening rather than replacing it. Three areas matter most.
The quadriceps often tighten from compensating for weak glutes. Stand holding a wall for balance, pull the heel toward the buttock, and hold for 20 to 30 seconds without arching the lower back. The iliotibial band, the thick strip of tissue running down the outside of the thigh, contributes to lateral pull on the kneecap when tight. A standing IT band stretch, crossing the sore leg behind the other and leaning away from it, targets this directly, though it can feel less satisfying than a quad stretch because the band responds slowly.
Hip flexors shorten from long periods of sitting, tilting the pelvis forward and altering how load travels through the knee. A half-kneeling lunge stretch, tucking the pelvis under gently, opens this area up.
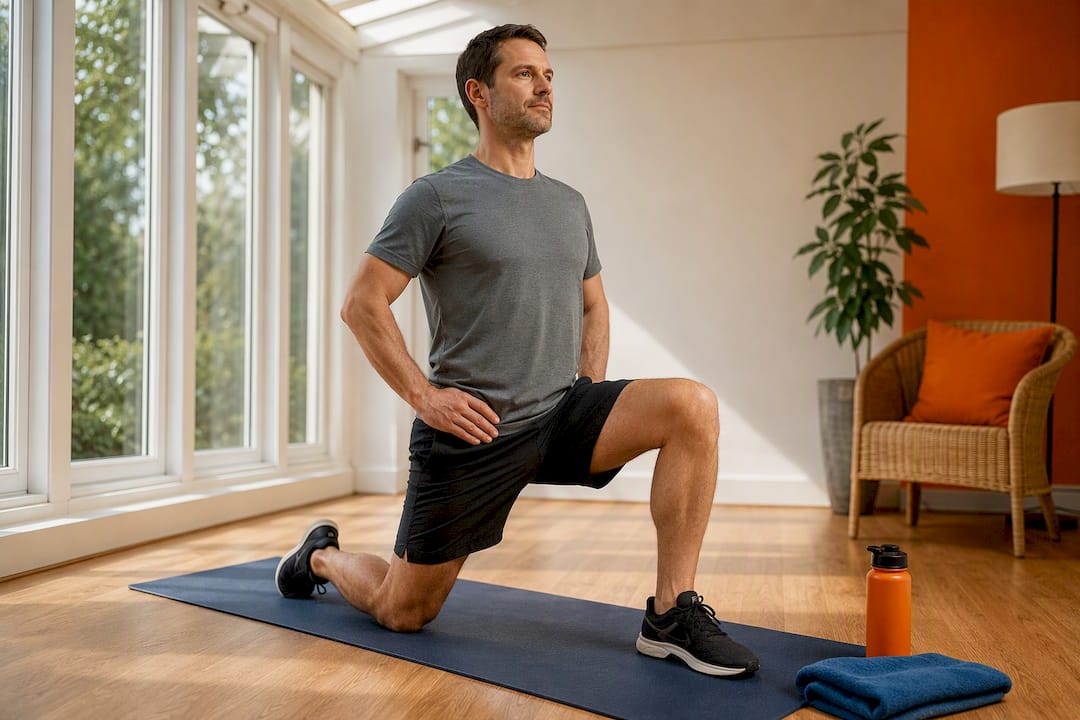
Hold each stretch for 20 to 30 seconds, repeating two or three times per side, ideally after exercise when the muscles are warm. Stretching cold tissue rarely achieves much and can occasionally aggravate irritable knees, so save it for the end of a session.
What actually causes patellofemoral pain syndrome?
Patellofemoral pain syndrome describes pain at the front of the knee, around or behind the kneecap, that typically worsens with squatting, running, or sitting for long periods. The mechanism almost always comes back to muscle imbalance rather than structural damage.
When the hip abductors and external rotators are weak, the thigh bone rotates and drifts inward during weight-bearing movement. That inward drift drags the kneecap laterally across the groove it should glide through smoothly, creating friction and irritation with every step, squat, or stair climb. Clinical guidance consistently points to hip weakness as a primary driver, which is precisely why hip-first strengthening dominates effective rehabilitation programmes rather than knee-focused work alone.
Quadriceps imbalance compounds the problem. Specifically, weakness in the vastus medialis obliquus relative to the outer quadriceps muscles lets the kneecap tilt or shift sideways rather than sliding straight up and down. Tight lateral structures, including the IT band, can pull in the same direction, adding mechanical strain on top of muscular weakness.
Training errors matter too, sudden increases in running distance, hill work, or step-heavy sessions, without matching strength, is a common trigger. None of this points to permanent joint damage. It points to a mechanical pattern that responds well to correcting the muscles controlling the knee.
Do shoes and foot alignment make a difference?
Footwear rarely causes patellofemoral pain on its own, but it can amplify an existing mechanical problem considerably. Excessive foot pronation, where the arch collapses inward on landing, feeds the same inward knee rotation that weak hips cause, effectively stacking two problems on top of each other.
Worn-out trainers lose their support structure long before they look obviously damaged, so checking tread wear and cushioning every few hundred miles is worth doing rather than judging by appearance alone. A shoe that's lost its stability under the arch stops correcting pronation exactly when the knee needs the help most.
For some people, off-the-shelf insoles or gait retraining make a genuine difference; for others, footwear is a minor factor next to hip and quadriceps strength. If pain persists despite a consistent strengthening programme, a podiatry assessment can identify whether foot alignment is quietly working against the rehabilitation you're doing everywhere else. That's a targeted check, not a first-line fix, and it works best alongside exercise rather than instead of it.
Why balance training belongs in your rehab plan
Strength alone doesn't guarantee good control under real-world conditions, landing from a jump, cutting sideways, or catching your balance on uneven ground all happen faster than conscious muscle activation can manage. That's where neuromuscular control training earns its place.
Single-leg balance work retrains the automatic, reflexive stability that healthy knees rely on without you thinking about it. Standing on one leg for 30 seconds, progressing to an unstable surface like a cushion or wobble board, forces the hip and ankle muscles to fire in coordinated patterns rather than in isolation. Adding small perturbations, a gentle push, an eyes-closed variation, or a ball toss, pushes that adaptation further.
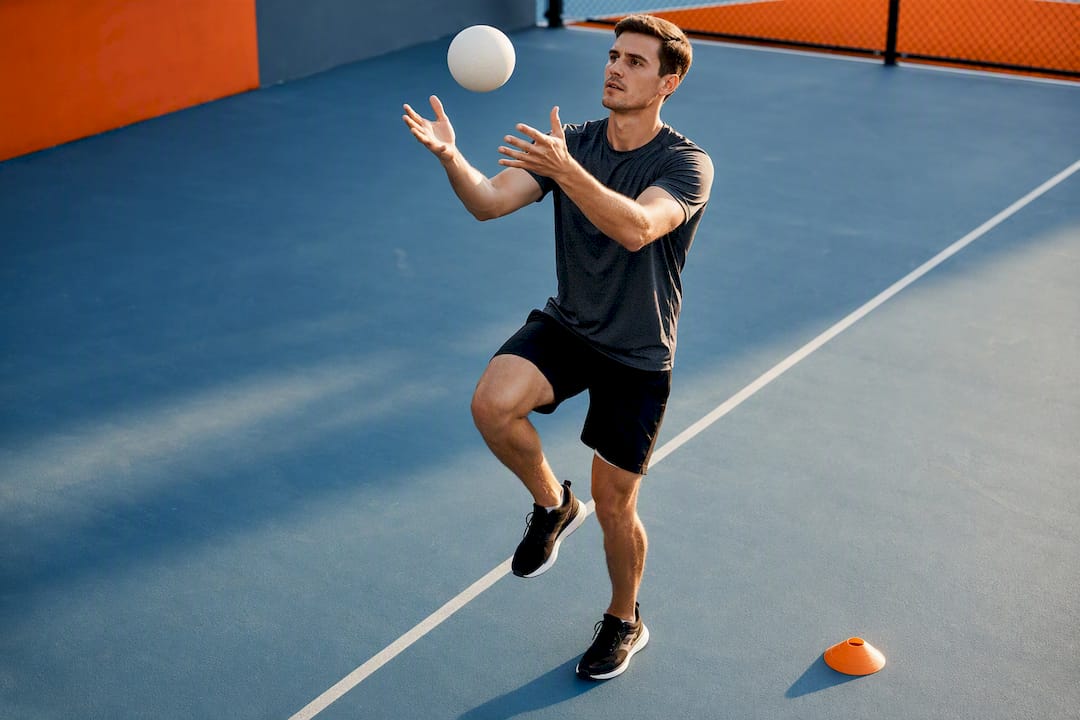
This matters most for anyone returning to sport, where sudden direction changes demand instant stability rather than the slow, controlled movements used in early rehab. Skipping balance work and jumping straight from step-ups to full training sessions is a common reason pain returns once someone resumes running or team sport, even after weeks of dedicated strengthening.
Fitting exercises into a full recovery routine
Exercises for knee pain work best inside a routine that respects recovery, not one crammed in around it. Training the same muscles every single day without rest tends to blunt progress rather than accelerate it, because strength adaptations happen during recovery, not during the exercise itself.
Sleep, hydration, and general activity levels all influence how well tissue repairs between sessions. Cutting total training load temporarily, fewer running miles, lighter gym sessions, rather than stopping outright, tends to work better than complete rest, which can lead to deconditioning that makes the eventual return harder. Reducing volume while maintaining light activity keeps general fitness and joint tolerance moving in the right direction together.
Pairing this rehabilitation work with broader hip-strengthening habits supports the same muscles from multiple angles rather than isolating the knee. If pain flares after a session, that's a signal to scale back the next one slightly, not to abandon the plan entirely. Consistency across weeks matters more than intensity on any single day.
Where to read more on patellofemoral pain
- The NCBI Bookshelf summary on stabilising exercises lists the seven core movements used in most rehabilitation programmes.
- A systematic review of exercise therapy backs structured strengthening as the primary evidence-based treatment.
- Cleveland Clinic's exercise guide offers clear step-by-step examples with progression ideas.
The mistake most patellofemoral advice makes
Most generic advice on patellofemoral pain treats the knee as the problem to fix, when the evidence points squarely at the hip. Programmes that jump straight into knee-loading exercises, squats and lunges from day one, often aggravate symptoms because they skip the muscle that's actually failing. Hip-first activation isn't a nice-to-have add-on; it's the sequencing that determines whether the rest of the programme works at all.
The other gap in conventional advice is the binary between "rest completely" and "push through it." Neither serves recovery well. Supervised progression tends to outperform unsupervised self-management, largely because a clinician catches technique faults, knee valgus, poor step control, that patients rarely spot in themselves. If you're three or four weeks into a self-directed programme with no real change, that's the moment to get an assessment rather than keep adjusting reps in the dark. Strength matters, but it only translates into pain relief when the movement pattern underneath it is sound.
— Ivan
Get a personalised plan from Parks Therapy Centre
Parkstherapycentre is the practical next step when a home exercise sheet only gets you so far. Unlike generic online programmes, our physiotherapists watch how your knee actually moves, catch the valgus collapse or foot rotation you can't see from the inside, and adjust load and progression around your response rather than a fixed template.
That matters most if you've been doing clamshells and step-ups for weeks with little change, because the sticking point is usually technique or pacing, not effort. Our team, working across Bedfordshire and Buckinghamshire since 1986, builds each programme around movement analysis and muscle testing, then tracks outcomes so progression is based on evidence rather than guesswork. If persistent knee pain has left you stuck between resting completely and pushing through, a session focused on knee strengthening progressions can identify exactly where your plan needs adjusting. Book an assessment online and get a programme built around your knee, not a generic template.
This article is general information, not a substitute for advice from a qualified doctor. Consult a qualified healthcare professional about your own circumstances before acting on anything here.
Sources
- Patellofemoral pain syndrome (runner’s knee): Learn More – Seven exercises to stabilize the knee - NCBI Bookshelf
- Exercise for treating patellofemoral pain syndrome - NCBI Bookshelf (systematic review summary)
- 5 Best Exercises for Runner's Knee (Patellofemoral Pain) - Cleveland Clinic